Friday, December 28, 2018

Reaver Legs

Some construction work on the legs of the Reaver Titan from Forge World today. The basic assembly for the thighs and calves is done - the fiddly bits remain to be achieved. In short, I do not want this titan to be looking static. I favour a more dynamic pose, but need to play this off against the necessary practicalities of transportation dimensions and ensuring that the titan balances. Hence, I want to have both feet on the ground realistically, despite my inner urge to try something one-footed and mid-run or mid-stride. 

To ensure that the titan is solidly and robustly constructed, I am going to pin a number of the major components together. The first image shows the holes that I made for a brass rod to be inserted in one of the chunkier leg pieces. 


Also notice here the scoring that I have done around the drill hole. This scoring is to ensure that the glue bonds better to the parts and is a technique that I have used for decades to rough parts up to make them come together better. 

Below is the basic thighs and lower leg components all assembled and awaiting connection to the hips and feet (plus toes). I need to do some dry fitting before proceeding too much more to ensure that I can get the post that I want. 


However, one issue has already reared its ugly head for me. The next image shows an excessively thin bit of resin that was removed along with the gate when I was chopping it from the sprue. As can be seen, the resin has not been cast solidly enough, but instead contains a large bubble inside the hemisphere (the other leg has no such issue and is solid throughout). 


I am a bit disappointed by the quality here. However, I think this might not be too much of a big issue since this hemisphere will ultimately connect with the foot. I plan on filling out the large bubble with some milliput or greenstuff, and adding a long brass rod to ensure a high quality connection to the foot (I was going to insert a brass rod regardless for stability purposes). All that said, it is still annoying to find these kinds of hidden problems (defects?). 

Thursday, December 27, 2018

Reaver Unboxing

This is the first in a series of posts about the building of a Reaver Titan from Forge World.

As with all such projects, the starting point is unpacking the box and checking everything out. If you have never seen a Reaver titan before it is constructed, and ever wondered what it looks like straight out of the box, then this is it. Below, I have scattered all the components on to my table to inspect. Large and small, delicate and robust, these are the entire contents of the Reaver box freshly delivered; no trimming or anything else has been done at this stage. I'm merely inspecting the parts to make sure that they are all present and correct.


Speaking of the box, I guess not many people get to see what that looks like either, so here it is below.


More on this project soon!

Wednesday, December 26, 2018

Reaver

The Fabricator General has decreed that your army may deploy the might of a
Reaver Titan.

Tremble foes of man for the might of the Omnissiah is upon you.


Thought for the day.
A moment of laxity spawns a lifetime of heresy.

Sunday, December 23, 2018

Constructed Termite


With the main tube glued and dried, completing the build on the Termite was very straight forward in the end. The top of the tube is a series of three concentric circles of drill bits that was very easy to put together. The rear was just one major blob of resin with a few decorative items to add on to it.

The doors to the interior of the vehicle can be modelled opened or closed. I decided to have one of the doors opened and the rest closed. They sit nicely on runners which means that the doors can be posed anywhere from fully opened to partial, to sealed shut.

On top of this, there is a choice of weapons for the upper part of the termite. Here, I've chosen to have the bolters since in-game I wanted a base line points cost for this transport.


Overall, a very nice and easy build in the end. I think it will be fine to paint, even though it has large featureless surfaces. I'm thinking some spray paint in Alpha legion colours, followed by some detailing and some decals on the surface. But that's a job for another day.

Friday, December 21, 2018

Termite Tube

Putting my Termite Assault Drill together has proved to be tough work in part. Or: at least it was until I realised that the best way to do this was not to wait until one segment was completely dry, but to do it using clamps. The only little snag here was that I didn't own enough clamps to do this the "right way", so I improvised.

In the image below, the nature of this improvisation is clear: hair bobbles. These are the stretchy bands used to keep longer hair in pony tails or tied back. They also double up very effectively for working on miniatures as it turns out!


The main tube of the Termite is not actually hard to put together. The main issue is actually getting everything to sit right all at the same time so that everything went together neatly (as I wanted to avoid gaps between the parts as much as possible for obvious reasons). This was ultimately why I decided to glue the main body of it together all at the same time rather than just two of the sides and then wait for it to dry out completely before attaching the next side to it. The hair bobbles worked very nicely for keeping everything in place (and the tread of the termite, in turn, kept the bobble in the right location). Finding ones with the right tension was straight forward enough, and I now keep a set of them for my hobby work. 

It is all nicely dry now and ready for the next few steps.

Thursday, December 13, 2018

Games Workshop Southampton

Strictly, this is not a Games Workshop "branded" store: it is a Warhammer store now. That aside, my travels took me to the South Coast of England recently and afforded me a few hours to myself to explore the city of Southampton. As I sometimes do, I decided to do my "mystery shopper" thing and go and locate the Games Workshop store in the city and have a look around. 

Physically, the store is located on East Street, which is just South East of York Gate in the city. East Street is touted as "speciality stores" on the street signage. I found this slightly at odds with the occupants of the buildings. There were plenty of gambling shops, and several charity type shops on the street. Regardless, it seems that GW is a speciality (along with several other genuine specialist shops) on the small street, so that at least is correct. I'm not so sure about the location itself. It feels a little isolated in its position with arguably little footfall from the main high streets north of its location. Indeed, the main railway and bus stops are close enough, but one does have to strike out in the direction of this store to get there, rather than chance upon it. 


The store itself is of a moderate to smaller size. The front window pictured above gives a reasonable impression of the scale and size of the place (and the image below shows in the background the depth of the store, along with a miniature in the window that really took my eye!). 


I found the staff pleasant, easy to talk to and knowledgable about the hobby - which is always good. Indeed, the staff here were very accommodating and didn't apply too much pressure on me. Hence I bought a little something. The stock is reasonable, albeit standard for Games Workshops these days, and the gaming tables / space in the middle adequate for most purposes. 

Overall, this is a nice store, but I do question its physical location - a bit north of York Gate might be a superior location, although I do acknowledge that the rents would correspondingly go up. 


Friday, December 7, 2018

Wargames Gallery: Infestation

Deep within the rotting heart of the lower levels of the Hive spire lurks something altogether more sinister than brutish gangs in need of expedited Imperial discipline...


Wednesday, December 5, 2018

Termite Unboxing

It has been a little while - and sorry for the delay to my regular readers. To avoid burn-out on the hobby, I am not going to be posting ~daily any longer, but will be posting at a more leisurely rate from herein. 

For today's post, I wanted to share what an Imperial Termite (also known as the Terror Pattern Termite Assault Drill, but I'm old school) looks like fresh out of the box. In the image below, I have made no cuts, no adjustments, and not even washed the parts. They are literally raw out of the box and laid out on a table for inspection. 


As can be seen, there is plenty of little issues here. They range from the large amounts of flash (thin films of resin) seen in the upper left part of the image wherein a large portion of the (open) door is covered by the flash, through to little minor warps, and a couple of air bubbles here an there. I would say that the amount of air bubbles that I encounter in Forge World's resin is much reduced these days compared to when I started collecting their products. And that is to be commended. There is still a fair amount of work in this particular kit to be carried out though. I will start it off with a thorough and good wash in warm soapy water with an old toothbrush to get rid of the releasing agent that I spotted on a couple of surfaces. 

Other than that, this build looks - in principle - like it will be a straight forward one. I hope that I will be proved right.

Army wise, this termite will serve as a flexible extension to my Alpha Legion forces. I very much like the idea of death from below AND above used in conjunction with one another. It seems rather fitting for an Alpha Legion force to be honest. 

Wednesday, October 31, 2018

Shroud of Night - Review

I had read that there was a new book out about the Alpha Legion, but in 40k, rather than 30k. I was curious enough about it (and had heard some good things about it) that I wanted to get hold of it. Hence, when I was in the city, I popped in to the local Games Workshop store to pick up a copy of the tome: Shroud of Night (Andy Clark).


There's a lot going on in this book - in terms of lore, in terms of plot advancement for 40k, and perhaps answering a few questions about one of my favourite legions from 30k: the Alphas. 

Firstly, I must admit that I really liked the characterisation of the 40k Alpha Legion. As with my own prejudices, these Alphas have not fallen to, or committed themselves, to Chaos. In many ways, they are "pure" - or at least free from corruption to begin with. In some ways, they reminded me of the  marines in the Soul Drinkers series of books - a chapter that was freed from the Imperium, but still doing the "right thing" ... sort of. Except this time, the protagonists are totally working for themselves. 

Finding themselves marooned on a world where they'd killed most others, the Unsung (as this Alpha Legion Harrow calls itself) finds a way off by agreeing to undertake a mission for the Emperor's Children (who seem to continuously think they're the best, but merely seem to get outwitted for the vast majority of the book ... except for a potential twist at the end).

The story focuses on the Alphas taking out a plot maguffin (I don't want to spoil it) for the glory of the Emperor's Children, and as the price for helping them earlier. To do so, they need to enter a war zone and get there before a large contingent of World Eaters get to the self-same plot maguffin. Opposing them are the Imperium -- they're fighting on an Imperial world behind the new Warp incursion in 40k, a world that is a lynchpin for the local segmentum. 

Along the way, the Alphas fight to not become corrupted -- some of their number really want to accept the "rewards" of chaos that they have felt they have earned; there's a daemon sword that's also trying to corrupt them. Most are strong enough to resist, others are not. Some of their number want a different way to fight. Others amongst them want to just go their own way and say goodbye forever. 

We see the Alphas fight, but not as they did in 30k. They have a lack of resources of a legion, and are forced to be very inventive along the way. I really liked this evolution and characterisation of desperation by the Alphas. I genuinely hope that they will release another book on the Unsung as I'd certainly buy it. Its one of the better publications recently in my mind.

The negatives include the appearance of a certain Imperial Saint. I get that she might be there, but its just a little bit on the implausible side for me. The appearance of Kharn the Betrayer was also a surprise. I don't know why the World Eaters who still possess some semblance of sanity still tolerate him being around. Really. No wonder Kharn almost fights on his own (albeit with daemons). That said, all blood is welcome I guess. I had less problems with Kharn being in the book than I did with the Saint. 

Other than that, a great read overall!


Thursday, August 30, 2018

Salted Mechanicus

I began a salting project for my Mechanicus Scenery a while ago and have progressed significantly with it offline. Today is therefore an update on this (rather large) project. 

I commenced the project by applying salt to random parts of my terrain in clumps and lumps all over the place. This was done by simply using water and salt (the water acting as a weak glue) over the base coat. The base coat here is black. However, I have used some silver spray paint to go over the black to provide a bit of a random look to the base coat in many places. This approach was deliberate in order to get a varied look from the salting technique at the end of the day.

The next step that I undertook was to grab my air gun and spray paint the Mechanicus terrain with green paint, followed by various highlights in grubby orange colours. The first image shows the result of this step.


The globs of salt can clearly be seen still stuck to the terrain at this point (check out the left hand panel of the railing in the image above in particular - but also the other two panels of the same railing and a few other bits that can also be seen in the image. 

To proceed, I took a strong toothbrush (and at one point, a needle) and started to chip away the salt that I'd scattered over the terrain. The purpose of this is to get rid of some of the sprayed on green and orange paint to reveal the black and silver base coat beneath. The next image shows what the terrain looks like after removing the salt.


With the salt off, the specks of black and silver start to show through. Its like the green paint (or decay?) has been chipped away to reveal some fresher metal beneath. Of course, we could have inverted this process by having something brown and rusted looked at the base coat layer -- chipping away the paint in this manner would reveal the brown rust layer beneath. That's also perfectly valid. Here I have simply chosen to do it this way to reveal the original metal beneath -- it still looks solid, but the terrain looks like it has been weathered, worn, and not seen too much attention recently, which was the look I was after.

Already at this stage, the chips showing through look realistic. However, I wanted to further enhance the look of the chips. I did this by carefully applying an edge of lighter green and in some places black to the outskirts of the chipped paint. The result of this is below.


Overall this communicates a terrain piece that has been neglected for a long while and could do with a new lick of paint. As if that is going to happen in the underparts of some patulous hive city. 

There is still plenty of work to do on this terrain though. I want to pick out some of the cables (I started with a red on that connects the underside of the middle and right panel of the rail here) and get to work on splotching some muted yellows around the place to give it a muckier and more industrial look. So although the main work of the salting is now complete, there is plenty left to do with this project yet. 

Saturday, August 25, 2018

Full Lernaean Terminator Squad

I have finally completed assembling the full Lernaean Terminator Squad for the Alpha Legion. As readers will be aware, I bought a sixth body and extra parts to make best use of the left over bits from the kit (namely using the conversion beamer on one of the legionaries). Hence this squad is six and not five complete members. They are based on a mixture of parts that I had lying around that include the older style Imperial Ruins and Mechanicus terrain coupled with small rocks, cork and other assortments. Overall, I'm happy with the squad and now need to mix up a new batch of Alpha Legion air gun colour to use!


Monday, August 20, 2018

Lernaean Harrower with Power Fist

Having purchased an extra body for use with my Alpha Legion Lernaean terminator squad, I set about thinking what I wanted to do with it. The main goal was to use all the bits in the terminator squad, hence having the volkite right arm was a given for this model since the conversion beamer was used on another Lernaean

Looking through my (now several years old) review of the Lernaean squad, nothing particularly sprang out. Hence I decided to choose the tried and trusted power fist option! Although I might magnetise this as a chain fist later, the power fist is an ideal choice to kit out the Harrower with amongst all the other power axes. It gives the squad a little bit of extra kick in close combat and poses a threat to lighter vehicles. 

In addition to the power fist, I also ordered a couple of more bits: the extra shoulder pad (resin) being the most obvious, but also a plastic bare head. I liked this head since it is shaved. I might attempt an Alpha Legion tattoo on it in the style of Dynat when I paint it perhaps. Not too sure about that just yet. Moreover, this represents a slight move away from my nearly entirely "all helmeted" force thus far, and a nice change. As can be seen in the image below, I have also used one of the plastic decorative bases to go along with this Harrower.


The only issue I have with this conversion is that the leather bits on the upper edge of the power fist are different to the Alpha Legion parts. Explicitly, there appears to be metallic triangles that terminate the legion parts, whilst the plastic component doesn't have them. To be honest, I'm not so bothered about this since when painted up no one is particularly going to notice. Except for me, obviously!

Overall I really like the way that this conversion has come out - doubly so for the left handed power fist that is pointing along the line of sight that the head is looking in. Seems befitting for a Harrower to be orchestrating the battle to my eyes. 

Saturday, August 18, 2018

Conversion Beamer Lernaean Terminator

Its been a little while due to holidays, but getting back in to the swing of things now. This post is a quick update on the Lernaeans that I got when they were released a month or more ago now. One of the major choices surrounding this unit is whether to assemble them using the included conversion beamer. I know a lot of people will immediately say a big fat "no" to this idea. And to be candid, so did I initially.

However, I did want to see how it looked. Plus I actually wanted to have at least one miniature looking like the canonical Lernaean depicted in the literature and on Forge World's site. For the boxed set though, this means that there will always be left over parts unless I magnetize the parts. Having fiddled around with the arms, I decided against magnets here. Hence I decided to try to hunt down a spare body (etc.) for the remaining volkite arm and stumbled across Egg Head Miniatures in the UK. I snapped up the extra body (plus other bits to make up a sixth terminator) and used it here so that I would not have any bits left unused. Now, I know my readers will say why didn't I just use the conversion beamer on a master of the forge, or similar. And you would be right - it is a more logical and tactical choice. I come back again to the fluff side of things. I'm assembling this Lernaean this was because it is cool looking and canonical. 

Here, I have mounted the terminator on to one of the spare parts from a manufactorum kit I had lying around and decorated it with stones and cork to finish the effect. The terminator is looking down the barrel of the conversion beamer, lining up his next shot. The axe meanwhile is gripped near the top giving the miniature a dynamic pose and synchronising with the stride that he is taking. Overall, a pleasing build to make and a model that I am certainly happy to have in my collection. 

Saturday, July 14, 2018

Wargames Gallery: Salamanders vs Alpha Legion

In position through infiltration, the Alpha Legion assaults from behind cover in to the Salamanders hoping to catch them off-guard in an early spear-tip manoeuvre.


Thursday, July 5, 2018

NOCF

Here at Warpstone Flux, we are supporting the NOVA Open Charitable Foundation. For the duration of the raffle, there will be a banner on the right hand side sidebar to click on and enter the raffle. 

The reasons that we are supporting this are multifold, but they are supporting charities that we personally believe in and have had a positive, and personal, opinion of. 


The charity raffles are now open, and will remain open until 2nd September. There are plenty of high quality prizes for these raffles, including, but not limited to a Warlord Titan, a 30k Iron Warriors complete army, and a 30k World Eaters complete army ... plus plenty more besides (these are simply the ones that drew my eyes immediately!). Check out the link and have a look at the awesome paint jobs -- they are certainly inspiring!

Sunday, July 1, 2018

Alpharius - Finished Model

I finished painting all of the parts and have now pinned and glued them all together. I am delighted by the final result and aesthetic!

The first picture is a front view of the completed model. I am very pleased with the blue to green gradients that I have achieved in the panels of the armour, as well as some of the extreme highlights on the silver parts of the armour.

The second one is a rear view, giving a sense of what I've achieved with the cape. Even though it is not painted with metallic paint, there is a good hint of light and shade on the cape that is reinforced with the stencilling on both the rear and the side facing Alpharius. 


A little nod to the internal Alpha Legion civil war can be seen in the base, especially with the Omega symbol on the decal of the doomed space marine legionary on the ground. 

Total project time was probably about 12 hours, spread over a couple of weeks.

I am going to leave it there for today and let readers just look at the pictures instead of typing too much more. I will aim to take a few more pictures in the coming days under better light and with scenery to show off the model in different compositions. Until then, enjoy! Questions and comments welcome.

Saturday, June 30, 2018

Alpharius Shoulders

The upper shoulder pads are done! The approach here was to have a little experiment with how I am going to attempt the main body and legs of the model. The undercoat is black to provide dark recesses, followed by a base colour of alpha legion blue that I mixed up a little while ago. 

I then applied some subtle layers and inks of blues and greens to give the shoulders and scales a little bit of a gradient. This is tough to pull off since blue and green are a pair of colours that don't exactly complement each other well. However, I think the blend that I have done here is fine. The scales have been picked out with scorpion green on the top.


The silver around the edges is done with iron breaker followed by an inking of Nuln Oil. The highlights are done with rune fang silver followed by extreme highlighting with white. 

However, once I have glued the shoulders in place on the main model, I will return to the extreme highlighting to ensure that the glints are in the correct places. That is hard to do right now with the pieces off the model. 


Thursday, June 28, 2018

Pale Spear Painting

For Alpharius' pale spear, I wanted to at least to try to communicate some of the alien origin of this ghastly weapon. As with most hobbyists, my interpretation of the Pale Spear is that it is Necron in origin. Goodness knows how Alpharius got hold of such a relic, but I guess that's a part of his charm.

Starting with a black undercoat, I sprayed some silver on the the spear to use as a reference point for the azimuthal light. However. Unlike for Alpharius' body, I was not very happy with this approach and thought about using something else. Initially, I wanted to paint the blades of the spear in the same manner as a power weapon. Perhaps blues and lightning dancing across the surface. I abandoned this idea early on as I had labelled it as too Imperial looking. 

Instead, I wanted to try my hand at something a bit different. I elected to give non-metallic metals a whirl. Now, I will be the first to confess that I'm not usually very good with this approach. I am much more comfy with flaming swords or electricity dancing across their surfaces. Hence it represented a bit of a challenge for me. All good!

The image below shows the result.


For the non-metallic metal approach, I have wet blended black to white (through grey) on both sides of tips of the spear. However: the blending is inversed for each side and a delimited of white applied between them. The overall approach is sound, although I think I might re-do this on a different day (with a lower temperature) to get a slightly better result. 

The shaft of the spear meanwhile has been picked out in a mahogany and maroon colour around the grip, with a weathered silver approach for the central parts. The hands of Alpharius follow the colour scheme established on his main body.

Its getting closer to the time to glue all the parts together...!

Tuesday, June 26, 2018

Master Crafted Plasma Blaster for Alpharius

When I started to look at the accessories that Alpharius carries around with him, his main side arm was a master crafted plasma blaster. This was one of those cases that I did not know initially how I wanted to go about tackling. I thought about several permutations such as having a silvered weapon with some red or blue plasma coils. Or how about even brass plasma coils from them being inactivated? 

However, for me, the Master Crafted aspect of the weapon was what swung the colour scheme eventually. Not only is the sculpt of the plasma blaster notable for an upgraded gun handle, but it also comes with some exquisite detail across all of the weapon. I opted for a golden colour scheme for the main part of the weapon itself. This was to reinforce the master crafted aspect of the gun (and potentially remind me on the table top of this). For the plasma coils, I wanted them heated and ready to go. The choices were between red, green, and blue for me. However, since I am opting to have a heavy weapon plasma cannon squad use green plasma, I wanted to coordinate. Hence green was the go-to colour for me here. The end result is below. 


In some ways, it is sad that this side arm is so small! When glued on to Alpharius' thigh, it will be partially hidden. All that glorious highlighting that I've spent so long doing will be hidden. However, that's life. And I wouldn't forgive myself for not doing it on a model as expensive as a Primarch. 

Monday, June 25, 2018

Alpharius Cape

One of the bigger components that I've left as a distinct painting section for Alpharius is his cape. Forge World have painted this in a simple manner for their website and display purposes. However, I wanted to do something a little bit orthogonal to this. I have therefore decided to follow the camouflage paint scheme that my scouts have on their cloaks.


The effect is achieved using an airbrush over a stencil from Anarchy. Another example of this approach can be found on my Warhound titan. Here, I have placed the stencil in a number of locations and used a lighter shade of cream, as well as black for making the hexagons. I have applied a further edging to the hexagons in a number of places to suggest the mutability of the cloak's properties. There is still some touching up left to do on the cloak, but otherwise, this is approaching how the cape will look when finally glued in to place.

Sunday, June 24, 2018

Alpharius Base

The weather has not been conducive to painting recently (far too warm where I conduct my work basically). However, I have made significant progress with Alpharius' base. The image below shows how it is working out so far.


The base has been painted in a brown base coat and then inked with a darker brown/black mixture, followed by highlighting in almost a creamier version of the brown colour to give it the appropriate texture. 

Meanwhile, the space marine legionary on the base has had their basecoat applied in the same Alpha Legion colours as his master, with silver accents. 

Both the base and the marine still need plenty of work, but it is starting to come together nicely and actually looking like everything slots together well visually. 

Monday, June 18, 2018

Alpharius Base Coat

The base coat is now down on Alpharius. 

The painting follows my mixing up of a new batch of Alpha Legion colours to use specifically with the model (and with a Leviathan), and broadly matches my previous methods with this Legion. Some key differences to line troopers here are that I bothered to use a quantum of azimuthal silver to ensure that the top-down viewpoint might plausibly be a little bit more shiny and sparkly than a bottom-up one. 

To get the paint laying evenly on the surface of the model, I used an airbrush and made even strokes across the model with the gunmetal blue colour. I finished up by adding a hint of green in to my airbrush mixture and targeting the lower parts of the scaled panels of the model.


I followed this up by outlining where I wanted the silver on the model for the panel edging. This was done with a mixture of leadbelcher along with runefang silver in moderation. 

This is the undercoat completed for Alpharius. Clearly there is still a whole lot of work left to do. However, I am already pleased with the aesthetic that is coming across with this model. The scales can be seen clearly reflecting the lights in my house due to the silvered-blue nature of the model. 

The only other thing to mention is that I have glued the head in to position as well. I did this using the model temporarily tacked on to the base to get the tilt where I wanted it. Not entirely looking downwards at the unfortunate marine below him, nor ignoring him. Just the right amount of martial contempt, I think. And multi-tasking. I imagine Alpharius speaking orders in to his comm unit whilst dispatching the marine below him, almost absent-mindedly. 

Sunday, June 17, 2018

A New Batch of Alpha Legion Colour, and a Leviathan

In preparation for painting Alpharius, I needed to make some more of my home-brew Alpha Legion colours.

In some of my previous work, I have experimented with different types of Alpha Legion colours. Some are very blue. Almost light blue. Others are darker, more sombre. Most are metallic, or metallic based rather than non-metal metals. Some have hints of green. Some a dash of purple. Yet in the main part, I have stuck with having metallic blue as my desired colour, and a darker tone of it at that.

In the image below, I have made up a new batch of my Alpha Legion blue colours. Using an airbrush, I have applied a mixture of various metals (rune fang silver mostly) with Vallejo (blue gun metal) and various dashes of citadel greens and blues for different layers and effects.


To be clear - the Leviathan contains several different layers. This starts with a black undercoat followed by an azimuthal application of silver from above. I follow this up with a metallic blue mixture based on the Vallejo gunmetal blue, and then proceed to add a dash of green tint to achieve the final layer's effect. 

Overall, I am happy with this mixture and will be using it as the basis for Alpharius' armour. Given the level of detail with the scales in his armour, I will also be doing a few other steps including highlighting in green, as well as a differential gradient from blue to green across some of the panels. Or at least, that is the plan at present. 


Saturday, June 16, 2018

Slow Progress

Some slow progress with Alpharius, but progress nonetheless.

The undercoat is now done on all the sub-assemblies. It took some time to decide what sub-assemblies to go with, but I am happy with the choices that I have made thus far. The image shows the undercoat on all of the sub-assemblies that I will be using for this project. 


Of course, some of these choices are obvious. The cape would be un-paintable if I were to attach it right now. The spear would just get in the way completely of the torso. I decided to keep the tabard, grenades, and the side-arm seperate as well. They can be glued on later. Perhaps the toughest choice was leaving the upper shoulder pads as distinct items to paint. It would have been easy to glue them on immediately, but I think I have made the correct choice here as this way I get to paint the visible upper plate of the under-shoulder-pads before attaching them. 

More on Alpharius soon!

Thursday, June 14, 2018

Alpharius Body Assembly

A relatively short update today. This is the body of Alpharius, assembled to the point of having the arms attached and the backpack on. The assembly was relatively pain free, although the arms do have their tabs where they attach to the main shoulders of the body, which required a little bit of knife work to flatten them out flush with the body. 


I am leaving the cape off (right hand side) as I want to paint it as a separate unit. I will dry fit the head before painting the body as well as I want the head angled so that it works both in the scenic display piece, and as a stand-alone miniature facing off other miniatures on the battlefield.

Other than that, I have located a few air bubbles which I have fixed up with some liquid green stuff (see the extreme left hand edge of the cape for instance). 

Alpharius is now ready for undercoating.


Wednesday, June 13, 2018

All Your Bases Are Belong To

Alpharius' base is fairly unique amongst the Primarchs. Plenty of the show dead bodies, and the results of their actions. Some are static and show staircases, or in the case of Dorn viewing a battlefield stoically. For Alpharius, he is in the midst of dispatching an unlucky foe (unlucky, because I'm assuming that he didn't see Alpharius coming. If he did, and charged, then he was going to be outgunned as a bolt pistol was probably never going to do the trick ... the bolt pistol lies on the ground next to this marine).


The first image (above) shows how the scenic base all slots together. It too me a little while to figure this out as I was rotating the smaller base around to see which rocks were supposed to slot in to each other. I thought I had it right, but there was a gap at one point in the circumference. 

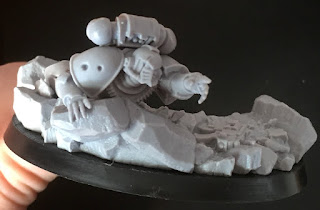
Slightly perplexed, I decided to instead dry fit the unfortunate marine to the base. The knee of the marine turns out to occupy the slight gap in the circumference and fill in the scenic base. I hope this tip helps someone out! Regardless, the correct orientation can be seen above. 


For the marine on the floor, my original thought was to make this guy in to another Alpha Legion marine. I was going to do this by swapping shoulder pads, or perhaps a different helmet. The sculpt of this marine meant that this would be tough to do. Both the shoulder pads and the head are sculpted together with other parts. Hence, I have opted here to keep the original sculpt intact as it simply makes more sense that way. Plus it retains everything in their original condition. 


About the only this that I did with the base was to score it (picture above). Here, I've simply taken my modelling knife and etched a grid pattern on the bottom of it. The reason for doing this is to ensure better bonding when glued to the citadel base. Other than that, the base is now assembled. 

Monday, June 11, 2018

Dealing with The Pale Spear of Alpharius

Crunch time for Alpharius' weapon. Do I stick with the little nib of a joint to attach the tip of the Pale Spear of Alpharius to the main haft of the weapon, or do I drill it to make it that bit extra secure? In order to determine the answer, I looked very closely at what I would have to do if I drilled it. The image below shows the situation.


The drill that I am employing here is about the diameter of a paper clip. Look closely and you will see how finely it matches the tip of the pale spear (upper resin part) and the main haft (lower resin part).

Now, I am no fan of the "nipple joint" (if I may call it that) at the bottom of the pale spear. There is precious little strength in such joins. Hence my immediate thought to drill the bits and pin them together.

In the image, it is possible to see that the tip of my drill bit is only fractionally smaller than the end of the pale spear. It is a close and tight match with almost not margin for error. By this, I mean that if I am going to drill it, I'd better be dead-on horizontal with my drill going in to the tip of the spear. The hand at the lower end of the haft is not as great a worry as there is more diameter to work with in case I drill at a slight angle. But for the tip of the spear, it has to be right.

Given my previous work (some masterworks even) over many decades, I figure that I am comfy giving this a go. Even with this previous experience though, it is a case of measure and line up three times and drill once. I look at it from all angles to check - constantly check - that I am drilling as horizontally as I can get it. Even a small deviation will cause the drill head to poke through the spear's side.

The photo below shows what can be accomplished with patience, accuracy, and constant vigilance.


The head of the drill bit is sunk by almost 10mm in to the tip of the pale spear. This is more than sufficient to create a quality pin for the model.

Below is that final pinned model. The only extra work I did here was to start the drilling on the haft of the pale spear by shaving off the nipple and then drilling in to the fist. Again, the depth was about 10mm. 


Although there is still a little bit of work to do here in straightening out the length of the pale spear, I am very happy with this pinning result. A very fine and delicate operation that took the best part of an hour to plan out and eyeball up. I don't recommend this operation for beginners at all though -- there's far too much scope for even a slight error spoiling the model. 

Good going thus far with Alpharius here though!


Sunday, June 10, 2018

Alpharius Unboxing

Following hot on the heels of unboxing the Lernaean terminators, today I wanted to share the photos of Alpharius himself straight out of the box. 


I have to say from the outset that the sculpt is gorgeous. I am hideously biased though as well. The scales on the armour are going to simply be a pleasure to paint when I get around to it.

However, there looks to be a couple of pressure points from my first inspection.
* The pale spear is warped already fresh out of the box. And its not a simple warp either (such as a C shape). It is more like an S shape. I will be using either some boiling water or a hair dryer here to correct the shape back to linear. 
* I am worried about the positioning of the pale spear (plus hands) on to the main body of Alpharius and getting the pose "right". 
* The lower part of the pale spear is a separate section as well. The connection point looks very weak. I am tempted to drill it, but the diameter of the spear partially puts me off doing this. I need to see if I have a small enough drill before choosing to do this. 

Apart from those pressure points, my plan is to have the marine who is on ground in front of Alpharius be another Alpha Legion marine. I am considering swapping shoulder pads perhaps, although on the other hand, the paint scheme and some transfers would do the same job arguably. 

Time to do some clean up and get these parts off the blocks...

Friday, June 8, 2018

Lernaean Unboxing

Excitingly, the delivery is already here! I am now the proud owner of my own Alpharius coupled with the Lernaeans that went on sale today. Forge World shipped this at just after midnight UK time and it arrived late this afternoon to their new home.

Given that many of my readers will have already seen the unboxing of Alpharius and his components elsewhere, I thought I would show some images of unboxing the Lernaeans instead. [Don't worry, I'll do an Alpharius unboxing as well later].

The Lernaeans come in their own big box pictured below. Its about the same size as a Primarch box, give or take a little.


Inside the box, there are detailed instructions to help guide the process of building these marines.


Below are all the components laid out, straight out of the box. Obviously, I've not undertaken any clean up of the components yet, and flash can be seen in many places.

Some immediate notes.

* I will have to make a choice about whether I want one of them toting the conversion beamer or not. There are only ten shoulder pads supplied and eleven possible armaments. Magnetizing would be highly tricky for this.

* There are two axe poses: two with the grip half way up the haft of the axe, and three with the grip right at the top of the haft.

* There are a variety of poses possible here, and the arms can be positioned nicely.

* Heads all look the same. 

More on these marines at a later point! 

Friday, June 1, 2018

Scales of the Hydra

The wait is over! 

Today, Forge World announced that Alpharius and the Lernaeans are now on pre-order. I have been waiting, very literally, years for this to happen. Naturally, I have placed a pre-order for both, using the Scales of the Hydra bundle that puts the Primarch and his elite terminators together in a single order. 


The price point of both are a little higher than I was perhaps anticipating. The most expensive Primarch to date is Magnus. He is indeed a large miniature with a lot of extra things happening on his base (such as the magic stones he appears to be shooting ahead of him). To my surprise, both Rogal Dorn and Alpharius are next in line in terms of price. To be honest, I would have thought either Corax (with his large dynamic pose) or Horus (just because of the sheer bulk of his figure and his base) would be the next most expensive. To be honest, both Perturabo and Mortarion both have a large amount of bulk to them as well, including the base. To my eyes, Alpharius has somewhat less bulk in terms of the sheer amount of resin. However, given that he is new, and that I really like the sculpt (coupled with my statement above about waiting years), I am prepared to pay.

The Lernaean Terminators also feel slightly high. Compare them, for instance, with the Death Guard Deathshroud terminators, or the Iron Hands Gorgons. They certainly look like similar bulk and quantity of resin. Only the Iron Warriors tyrants are more expensive comparatively - and there we are paying for the missiles that they carry on top of their armour. However, seen against the Space Wolf Varagyr terminators, they are worth it. Basically: we get the conversion beamer for free in addition to all the other parts. Or maybe it could be put a different way. Ten pounds for a conversion beamer in comparison to the Death Guard? Once again though, these are miniatures that I have been waiting for such a long time to get my hands on that I was always going to order them regardless. Even if I don't use them as is, I think that they would make wonderful command squad style infantry. 

All that said, I'm really excited! Can't wait to open these guys up when they arrive in just over a week's time. I have waited years. I can wait another week for the pre-orders to actually ship.

[Image copyright belongs to Forge World. Used here under "Fair Use" clause to illustrate discussion above on the new products. No infringement intended on copyright.]

Friday, May 18, 2018

30k is alive and kicking

So, there has been a lot of "discussion" on the interwebs and social media platforms recently about the supposed demise of the 30k game format. I will not pretend to have any inside knowledge about the rumours that have been circulating, their origins, or anything associated with that.

What I do want to say is that from my perspective, 30k is very much alive and kicking.

There are plentiful reasons to think this. Here are a few off the top of my head.

* Tournaments. A large array of tournaments feature 30k alongside 40k and Age of Sigmar. As well as Lord of the Rings. These tournaments are very well organised and attended on the whole. More than this, there remains exclusive 30k tournaments. Sure, Rogue Trader events still happen and Rogue Trader is not a recognised format much any longer. But the interest from the fan base is still there and very strong.

* Miniatures. There are plentiful new sculpts and miniatures that are coming along now and in the near future. Mark well for instance the Alpharius miniature that I hope will be up for pre-orders soon along with the other Alpha Legion goodies (terminators, new Preators, and so forth).

* Rules. The continuing publication of the Horus Heresy series remains impressive. The White Scars and Blood Angels should be getting the specialist treatment in the next book in the series that is due out later this year.

* Books. This is underpinned by the long running range of Horus Heresy novels from the Black Library that keep on coming out. Perhaps they will reach an end soon with the siege of Terra being hinted at. But after that, there is the Scouring to deal with. Plus the other Primarch books. It will keep going for as long as people read them.

* Blogs. The sheer amount of material on the 30k era is impressive. I'm not even talking about the reviews that Warpstone Flux seems to be famous for these days -- they sheer quantity of painting, conversions, and every other gram of hobby goodness out there shouts out loudly that 30k is still in business and going nowhere.

Overall, the fan base is strong, and very dedicated. I don't put too much stock in some specialist parts being withdrawn from sale -- every company does this. I'm certain that replacement stock will be forthcoming at some point in some form or other.


Monday, May 14, 2018

Digest from Coventry

Like many others in the hobby, I was not able to make it to Coventry over the weekend to be part of the festival that was being held there. However, the internet being its wonderful self means that many of us don't have to miss out on the main announcements thanks to the wonderful hobbyists that do attend these events and regularly post to blogs and other media on the news being released. More than this, the Warhammer team themselves have got involved with doing what a large number of blogs out there are already doing: detailing the news themselves, but with already extant high resolution images of the new miniatures and games being previewed.

So, what caught my eyes this time?

Near the top of the list is the extensive Alpha Legion releases that are being made. I think a number of people were able to pick up Alpharius at Coventry, but I'm going to have to wait a few weeks longer for that by the looks of it. More interesting in the Alpha Legion territory were the impending release of two praetors, pictured below in the Warhammer Community image. 


These miniatures are very interesting from a number of points of view. Firstly the design is clearly meant to blend in with other miniatures. The terminator armoured praetor will clearly slot in very nicely alongside the Lernaeans themselves. The other one features a scaled set of armour that would be very much in keeping with the head under units. Note as well the cape on this one which could readily make it useful for this purpose. 

The terminator praetor deserves a second look though. Notice that the patterns on the terminator armour are not scaled particularly. Indeed, he stands apart from the Lernaeans impending release from a number of aspects. What strikes me in particular is the edging of the armour plates. The design here is not content with a regular edging pattern. Rather, it has inlaid spikes that are highly reminiscent of chaos warrior armour (i.e. they look like part of the chaos star symbol at some level) and that's a feature that is generally not seen on loyalist miniatures too much. I sincerely hope this is hinting at the wider internal Alpha Legion civil war and the factions within it taking more shape and definition. Can't wait to read up on this within the new Horus Heresy book which has been confirmed to include additional Alpha Legion background materials alongside the White Scars, Blood Angels, and daemons faction. 

It also looks like Adeptus Titanicus will be released fairly soon as well. The game miniatures themselves look exemplary. They really are scaled down versions of the large war machines themselves down to minor details. More than this, the scenery associated with the release looks very advanced, including the Realms of Battle style boards. Whilst I don't know if I will get involved in this new game, it does look enticing.

The reports of a new version of Age of Sigmar are very welcome too. In fact, its almost enough for me to dust off some daemons miniatures, or maybe even commence a new army. Almost. Very almost. However, at the moment, I am still fixated on the Alpha Legion in 30k, and on scenery and terrain in general. Those are the main items that I'm working on and playing with at the moment, almost to the exclusion of other things. 

The Harlequins codex and the revision of Sisters of Battle looks very advanced too and exciting. They are clearly both primed for a solid release. Just to repeat: plastic Sisters. Its been a very long time coming and a lot of people are going to be very happy to say the least.

Other than that: re-tooled dreadnaught drop pods, Anacharis Scoria, Land Speeders, and more are all inbound soon. These are good days for Games Workshop and Forge World it seems!

Monday, May 7, 2018

Salting

One of the techniques that I am experimenting and playing around with in painting the Sector Mechanicus terrain is salting. 

The technique and the idea behind it is simple enough. Essentially what I want to achieve is some kind of "masking" of random areas of the paintwork. I paint over them in a normal manner, but once done, remove the masking area to create a rough or chipped appearance. 

With salting, this is achieved through application of salt. There are various types of salt available of course, ranging from regular granular table salt through to rock salt and various sized chunks in between and beyond. 

The key thing with salting is that I want to achieve a random appearance. Hence it is necessary to think about the size of the salt grains to use. Here, I am using a blend of table salt and small rock salt that can be seen in the images below.


To attach the salt to the undercoat paintwork, I have simply used tap water. Dip a medium sized brush in to the water, then dab on some salt to the brush, and then apply to the paint work. I have deliberately experimented with very little water in some areas -- this leads to concentrations of salt that retains their original shape; and plentiful water -- this dissolves the salt in the main parts and makes it lie flatter on the paint surface. I anticipate that the latter (lots of water) will also be more regular shaped chips whereas less water will lead to more irregularly shaped chips. 

Once the next layer is applied over the top of the undercoat and the salt, I will go back to the dried paint and use an old toothbrush to chip off the salt underneath to (hopefully) reveal parts of the undercoat. 

Given the hot weather at the moment, I may wait a few days before doing these next few steps though. 

Friday, May 4, 2018

Undercoated Mechanicum Terrain

Deep in the Hive Cities, lurks various pipework relays connecting to vast storage vats and arcane boilers, incinerators, and forges. 

This particular kit is one that I've had for a while in the background awaiting some work alongside the rest of the Ferratonic Incinerator and Promethian Forge terrain of Sector Mechanicus fame.

For undercoating this, I wanted to take a bit of a different approach to normal and make use of some highlighting. So instead of using just a pure black undercoat, I have applied a zigzag of silver to the surface of it, as illustrated in the image. 


What I intend to do from herein is a bit of a "salting" approach to some weathering for this piece. I intend to apply table salt to the surface and then add my layers on top of the salt. Hopefully the salt will then scrub away revealing the black and silver underneath the chipped paint and provide some authenticity to the age of this sector. Once done, I intend to apply some browns and Typhus style corrosion effects to the chipped paint work. At least, that's the idea that I have in the back of my mind right at this moment in time. We shall see how this takes shape soon!


Saturday, April 21, 2018

Wargames Gallery: Low Flight

Flying in low, the Alpha Legion assets strike swiftly and precisely across the surface of the Forge World planet to secure their objectives before vanishing back in to the void leaving destruction and confusion in their wake.


Wednesday, April 18, 2018

Re-Visiting Lernaeans

In the background for the Alpha Legion, the Lernaean Terminators are supposed to be the cutting edge of their assault. The tip of their proverbial spear. The recent announcement from Forge World that these marines would be getting miniatures has me rather excited as I'm sure I will be getting a squad of them. Or so. The image below shows the miniatures previewed by Forge World (Image copyright via Warhammer Community). 


I like a number of features about these miniatures. Clearly the Alpha Legion iconography is a major draw card for them. However, this is also a negative in the sense that they are all the same. Yes: they should be to some extent. Countering this is the plentiful arrangement of armour styles we have seen for the regular troopers though. Hence I am a little surprised by the uniformity of their armour. 

I really like the scaling applied to the shoulders, arms and legs though. Some really nice work there, even if painting them will seemingly take a while(!). The poses are varied enough to be interesting and some conversion opportunities do present themselves as well.

What I really wanted to return to were their rules. I have covered their rules extensively before in my large Horus Heresy review series, but given the miniatures are going to be available to us soon, I thought it was worth returning to them. There are several striking features here:
(1) stubborn (worth the price in 30k).
(2) mixed weapons (the beamer is oddly placed for what should otherwise be a close combat squad).
(3) extra pip in WS. 

The third and first points are what make the points value of this unit almost (perhaps totally) worthwhile. Given the charge, they are going to make better use of themselves than an analogous (and more regular) set of legion terminators. In a terminator on terminator fight, they will be making back more of their points. Indeed, the points efficiency of these models is higher than regular terminators due to the extra WS pip. I sat down and did some sums and thought that the points efficiency was something like a gain of 10-25 per cent on regular terminators depending on the scenario used (they get the charge; they face analogous terminators; etc). Sadly I deleted that calculation off my files, but think I'm right in recalling that percentage. Hence these guys really are the elite of the terminators.

However, there is the problem about what to arm them with. The beamer just doesn't sit right; even though it is very, very cool (and thematically fitting). Potentially the best way to go is to simply keep the cost down as low as possible and take them as it. That said, arming them with power fists or chain fists is a good option as well given that they are swinging at the lowest initiative regardless. Plasma blaster is valid. But I cannot justify the cost of the beamer in comparison to a weapons platform such as a predator that can pull the same kind of duty. 

An alternative that I thought of trying to pull off is simply to have the beamer in there as a kind of flexible utility, but then have Alpharius replace the model. Just because. Shoot the beamer in turn 1, then have Alpharius show up to wreck some other units in a different part of the board in turn 2. Not a good plan. It wastes a lot of points. But the look on an opponents face if this ever gets pulled off would be good! On reflection, I'm not going to do this ... but I cannot help but think the beamer does look good on these miniatures, and I am one for the rule of cool... its just how to play it that still is the problem without a solution. Otherwise, this is a really good, and elite, terminator squad that should see some play at certain points levels. 
Related Posts Plugin for WordPress, Blogger...

Facebook

Sequestered Industries